Setting Up Our Podcast - The Audacity of It! - Part 2
Yesterday, I started explaining the process we use at GLCC to edit and post our weekly podcast. Here's the rest.
Now where was I?
Oh, yeah... we had trimmed the ends, taken out the peaks, and levelled the whole thing. Cool.
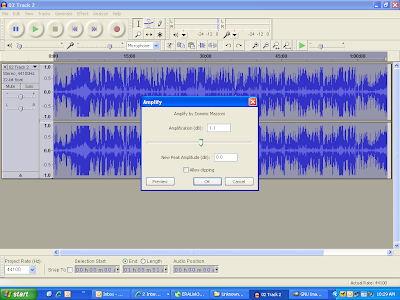
The next step is to maximize the volume across the entire recording. I do this because people listen to a podcast in different ways. Some listen on their computer with desktop speakers, some with headphones; some download it and play it in the car, some burn it to a disc. One of the reasons to reduce the high-amplitude peaks is so that you can bring the amplitude of the entire recording up. It is easy for someone to turn the playback down if it's too loud; they can't really make it any louder than it is on the recording.
To do this, I select the entire track by clicking in the gray area under the L/R slider to the left of the track. Then I go to Effects=>Amplify. The Amplify plugin will automatically set to the maximum level you can set the track without clipping. Click "OK" and get a cup of coffee. (Some of these plugins take a few minutes to apply to an entire track.
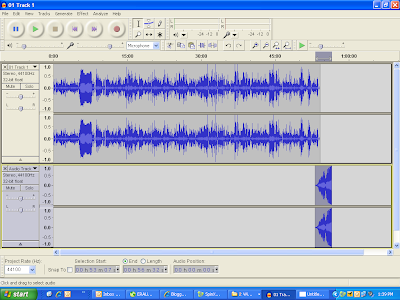
Sometimes I will take some music from the end of the track (music that I've cut) and make a bumper at the end, to fade in over the end of the speaking. This is easily done by adding a track (Tracks => Add New => Stereo Track) then cutting the section of music from the original track, and pasting it at the appropriate place in the new track, so that it overlaps the end of the speaking. Finally, I will add a fade in to the music section. (Effect => Fade in) (Actually, I use a VST "Cross-fade" plugin, but the standard Fade plugin will work fine.) The image below is what it looks like with the bumper added.
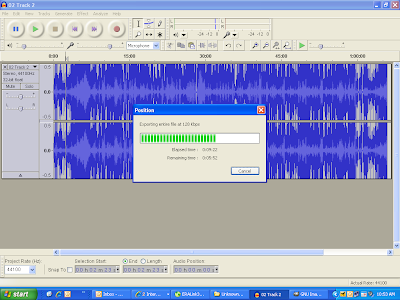
The last step is to add a Fade in and Fade out to the ends of the total track. I do a five-second fade on both ends, usually. From there, I go to File => Export. Audacity will automatically combine the two stereo tracks into one stereo track by default. (the other option is that stereo track 1 will become the left channel in the new file. Who wants that?)
Exporting can be done to a variety of files. Audacity does not come with a native .mp3 encoder (for copyright reasons), but will use the LAME (or any other) mp3 codec you may have installed. I export the file as a 128-bit mp3. You can also ID3 info right in the export dialog.
That's it in a nutshell. The podcast is now an mp3 file, ready for uploading. We host our podcast on the Internet Archive, largely because it's free, and I don't need to worry about bandwidth off of our own site. You can upload directly to the archive, but I use SpinXpress, which makes adding metadata easier. I encode for the web at 64kps to keep the file small. It all works great, however, the Archive cannot package the file with the correct iTunes headers. And if you're going to podcast, you need to be on iTunes.
So, what we do is use a separate blog (that no one actually visits, but you can!) on Blogger. All this blog has is the title to the podcast and an enclosure link to the mp3 file on archive.org. The feed from that blog then goes to Feedburner, where it is optomized for iTunes automatically. iTunes then pulls the feed from Feedburner, and puts it in the podcast directory.
The last step is to add a direct link on the church's website for folks who don't use iTunes or are browsing the site. We use Wordpress for the site platform, and I use the microaudio plugin to create the audio player.
It sound like a lot of steps, but it's really not. The longest parts are the encoding and uploading, but I can do other things while that's happening. The entire process takes less than an hour, front to back, and 0nce the file is uploaded, the "making it available" part takes less than five minutes.
Questions, comments? If you want something clarified, just comment and I'll be happy to.


This is pretty much identical to our process - thanks for posting it!
ReplyDelete